Integrate G Suite with Single Sign-On in 42Gears UEM
Okt 03, 2018 | 42Gears Team
Businesses use Single Sign-On to enforce uniform enterprise authentication and authorization policies across the enterprise. It improves user experience, eases account management and reduces password fatigue.
Single Sign-On
With Single Sign On (SSO), users can log in to one platform and then they are allowed to sign in to other applications automatically, across any mobile, web and desktop the user is using. SAML 2.0 allows users to sign in with G Suite by eliminating user-managed passwords and the reduces the risk of phishing.
G Suite
G Suite is a cloud-based productivity suite that help teams connect and get work done from anywhere on any device. It’s simple to setup, use and manage, allowing you to work smarter and focus on what really matters.
42Gears UEM now supports G Suite with Single Sign-On using which IT Pros can access SureMDM Web Console using G Suite credentials with SSO. It adds an extra layer of security to the account. This feature will eliminate the need to create users separately in 42Gears UEM.
Configure SureMDM with G Suite
To configure devices using G Suite credentials with SSO, follow the steps below:
1. Login to https://admin.google.com with G Suite credentials.
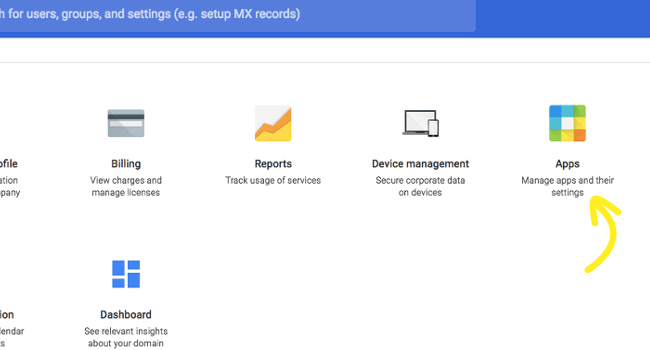
2. Click Apps.
3. Click SAML apps.
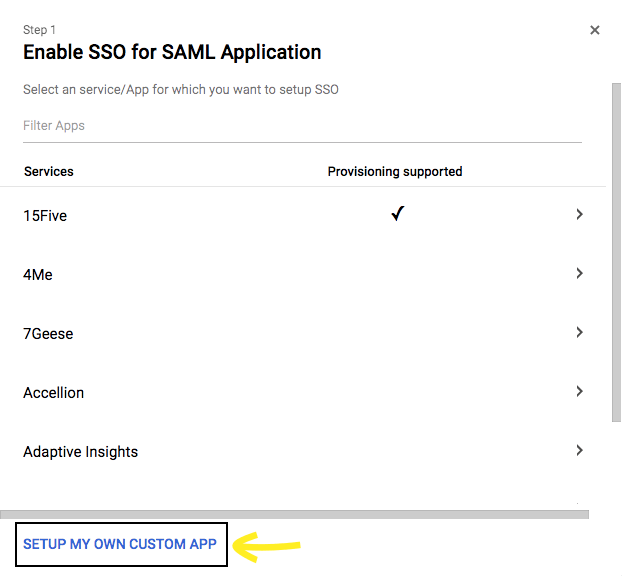
4. Click Setup My Own Custom App.
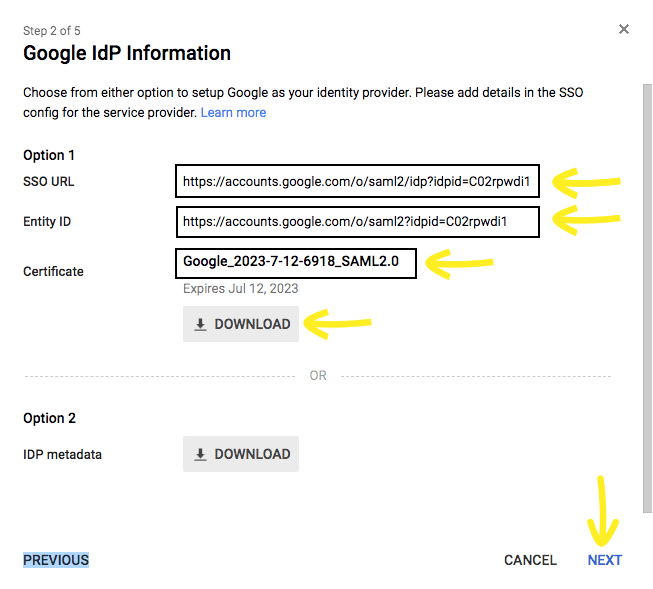
5. On Google IDP Information prompt, copy SSO URL, Entity ID and Certificate and click Next. Click Download to download the certificate.
Note: SSO URL, Entity ID and Certificate details are required while configuring SSO in SureMDM.
6. Enter Application Name and select the logo file in Upload Logo and click Next.
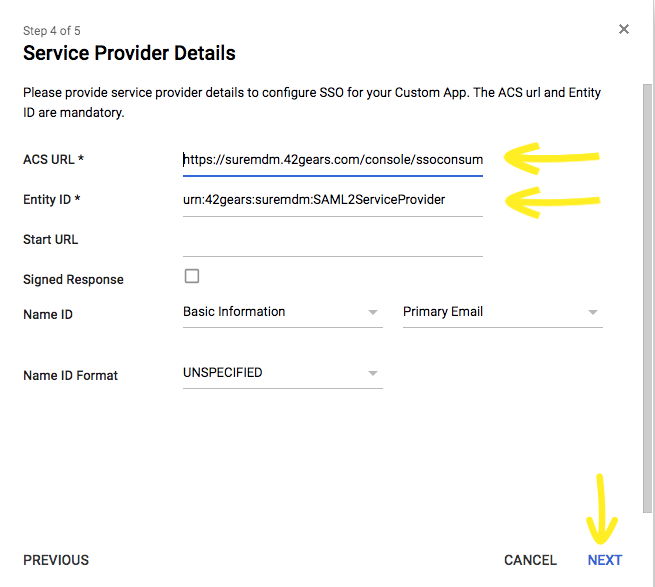
7. Enter ACS URL and Entity ID and click Next.
Example for ACS URL :
https://suremdm.42gears.com/console/ssoconsumer/xxxx
Note: Add your SureMDM DNS name and Account ID as
https://<DNS Name>/console/ssoconsumer/<account id>
and urn:42gears:suremdm:SAML2ServiceProvider
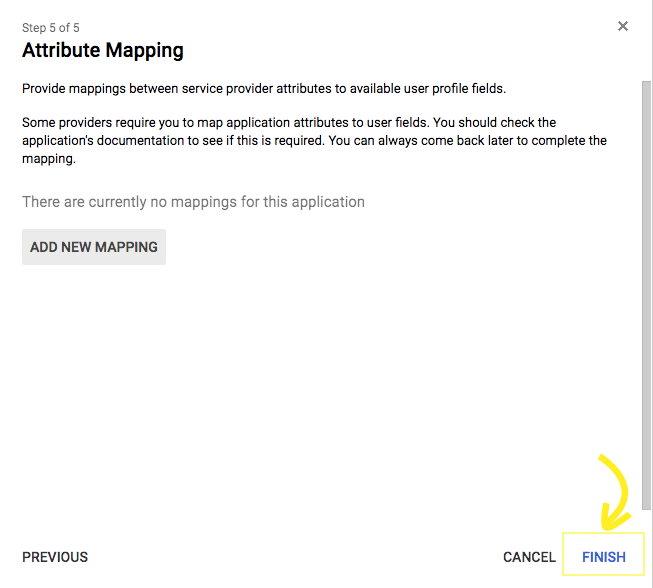
8. Click Finish.
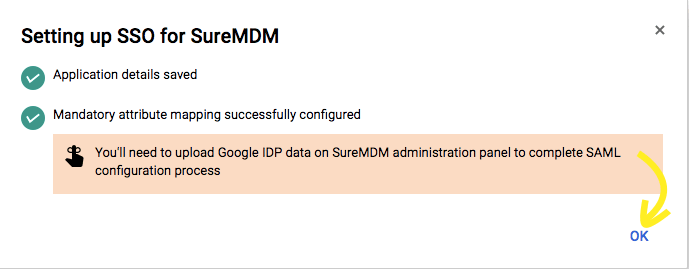
9. Click OK.
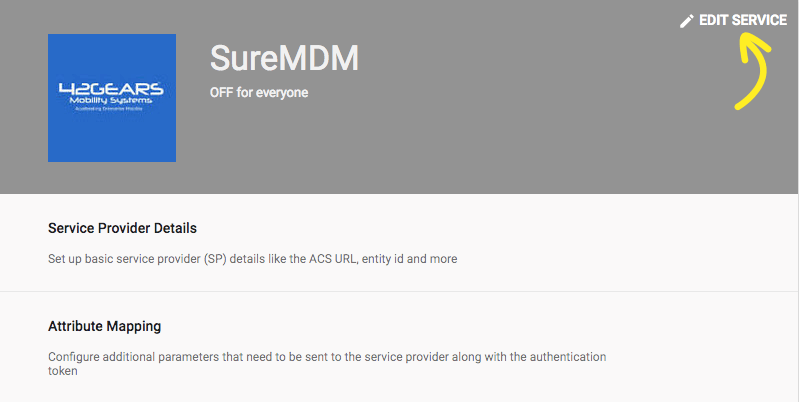
10. Click Edit Service.
11. Select ON for everyone and click Save.
Changes on SureMDM Server:
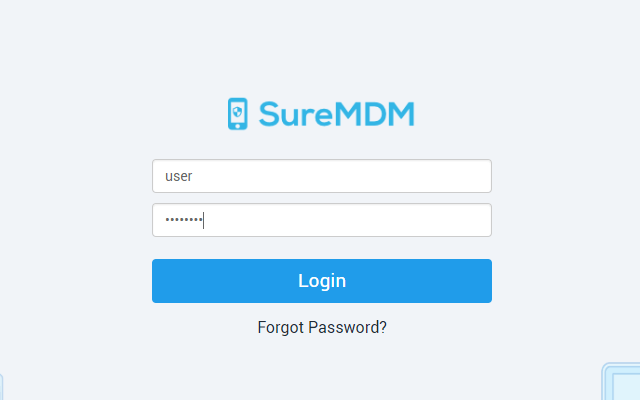
1. Login to SureMDM Web Console.
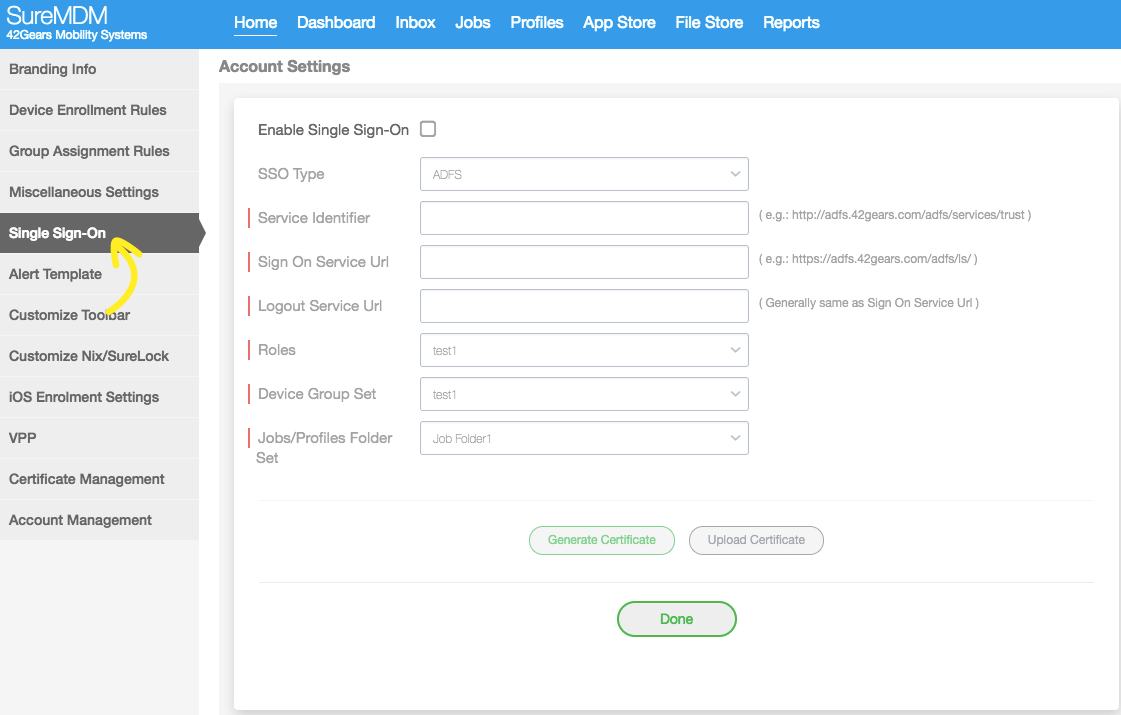
2. Go to Settings > Account settings > Single Sign-On.
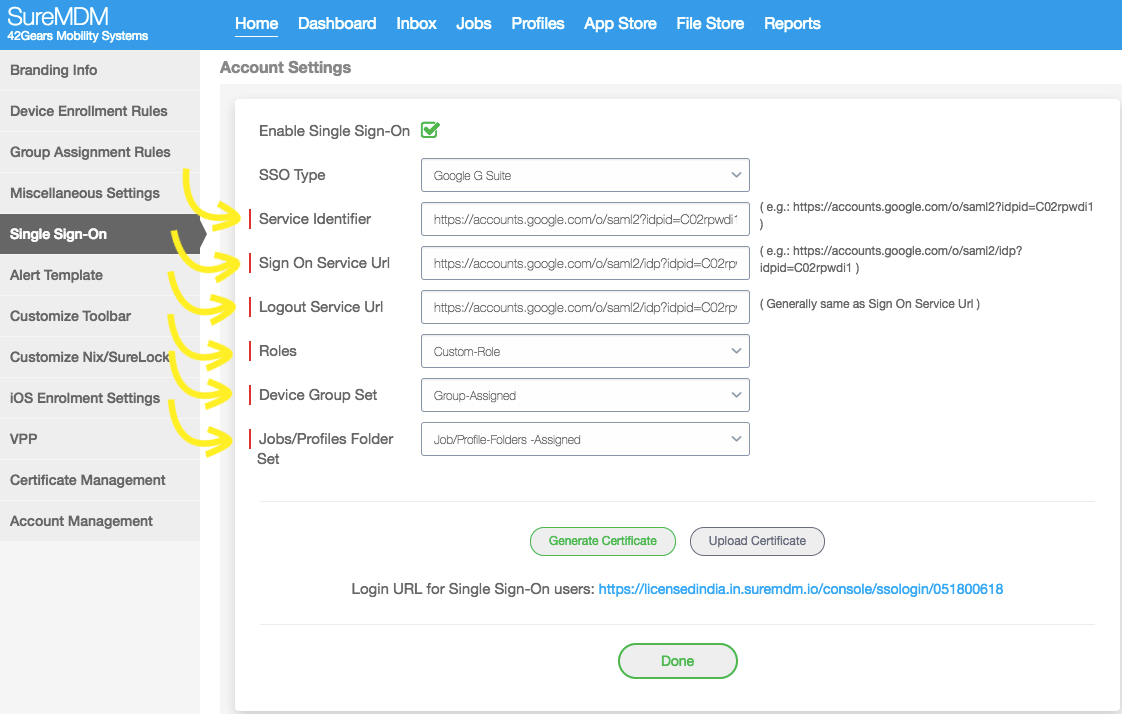
3. Enable Single Sign-On and select SSO Type G Suite from the dropdown list.
4. Enter Service Identifier, Sign On Service URL and Logout Service URL, which is copied from Step No. 6 in Google IDP Information Tab.
Assign Roles, Device Group Set and Jobs/Profiles folder set.
Example:
Service Identifier – https://accounts.google.com/o/saml2?idpid=C02rpwdi1
Sign On Service URL- https://accounts.google.com/o/saml2/idp?idpid=C02rpwdi1
Logout Service URL- Generally same as Sign On Service URL
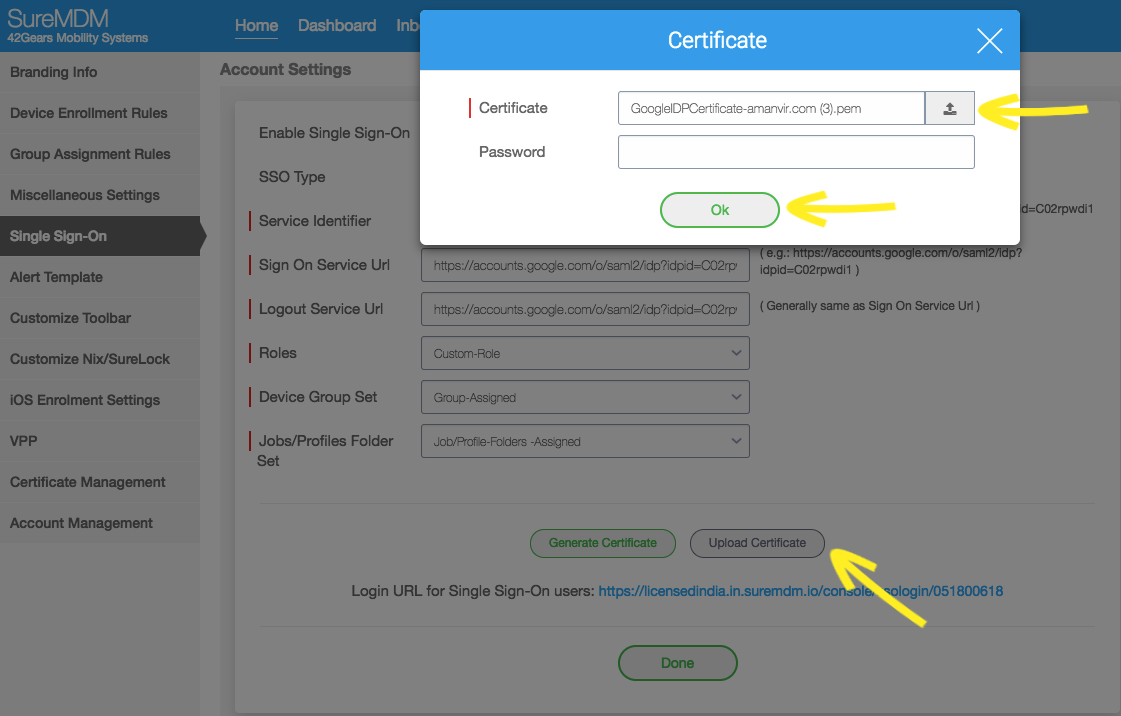
5. Click on Upload Certificate and upload the certificate which is downloaded in Google IDP information Tab in Step no 6 and click on Ok.
Note: Ensure that the password field empty.
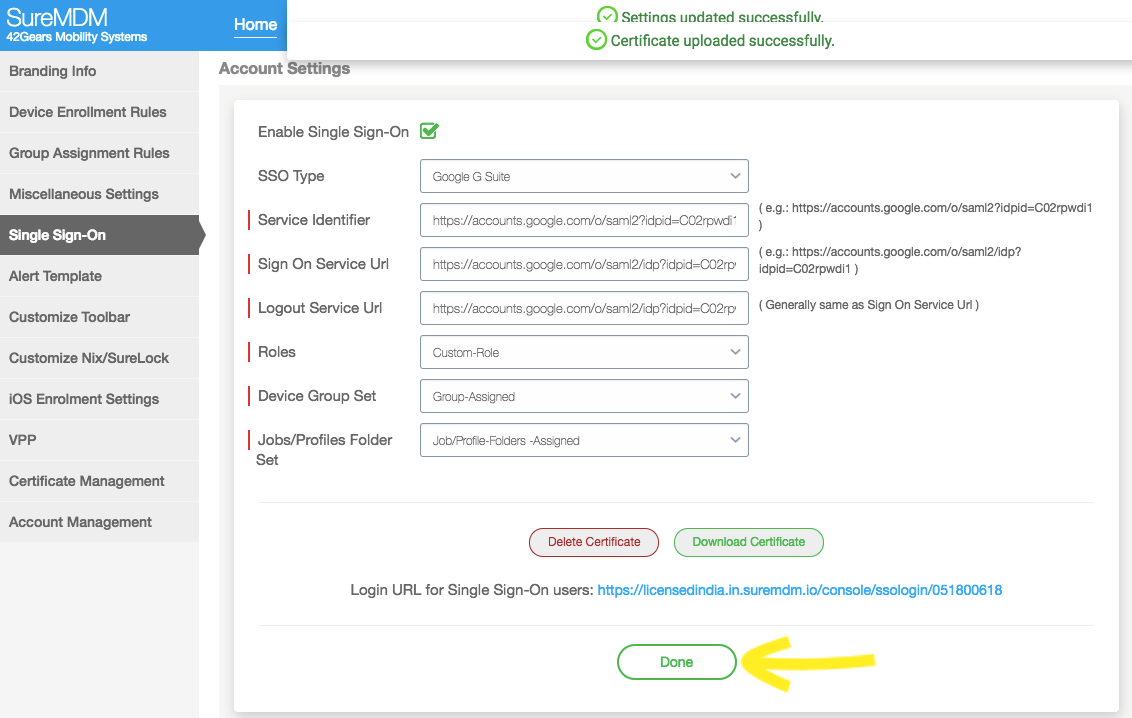
6. Click Done.
Once finished, IT Pros can login to G Suite account with any browser and use the URL below to login to 42Gears SureMDM server.
For example: https://suremdm.42gears.com/console/ssologin/0617240
Note: Enter your SureMDM DNS name and Account ID as https://console/ssoconsumer/account ID.
Click to learn more on how manage Android devices in G Suite account through Dedicated Devices (formerly called COSU or Corporate-Owned Single-Use) and BYOD profiles with 42Gears UEM.
To sign up for SureMDM’s free trial, click here.
Subscribe for our free newsletter


